On April 14, 2015 Microsoft announced the acquisition of DataZen. I still can’t tell you exactly what drew me to immediately setup a new VM and begin installing DataZen, but I did multiple times over the next few days. At my workplace, I quickly became the resident expert on the functionality of the DataZen Server. After sharing with multiple friends how to setup a DataZen sandbox, I thought I would finally write down the steps in this blog post to help you build your own.
Here are the two items you will need to get started:
1) A Clean Virtual Machine with either Windows Server 2008 R2 or Window Server 2012.
- For this post I’ll be using Windows Server 2012 with 2 processors, 4 GB RAM, and a 25 GB Hard Drive.
- I recommend using a Windows Server OS because DataZen will configure IIS automatically as part of the install. I have not tried installing DataZen Server on a Windows Desktop OS.
2) The latest install files of DataZen Server.
- Here is the link to the latest download. http://www.microsoft.com/en-GB/download/details.aspx?id=48221
- If by chance you download the DataZen zip file back on April 14th, I highly recommend making a new download. The first release on the Microsoft page had some bugs that were quickly addressed.
Side Note: If you are looking to start building dashboards, you do not have to build this sandbox. For building dashboards open your Windows Store, search ‘DataZen Publisher’ ,Open the Publisher, and create a dashboard from your favorite data source. However if you want to share your new dashboards and/or build KPIs you will need a DataZen Server setup so keep reading.
Begin Install
1. Boot up your VM with a clean install of Windows Server.
2. Copy the DataZen zip file on the VM
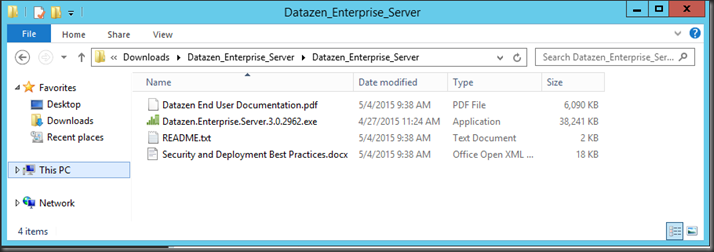
3. Unzip the folder as I have done in this screen shot.
4. Right click on Datazen.Enterprise.Server.3.0.XXXX.exe and click ‘Run as administrator.’
Side Notes on other files in the folder:
- The PDF is a replica of the online documentation. I find the Datazen documentation a bit lean.
- The README.TXT tells you what is in the folder, how to contact support, and the URL to the online documentation.
- The ‘Security and Deployment Best Practices.docx’ is a good guideline for getting started with your security and network team. I have used it a couple time with clients. It is not the end of the conversation, but the beginning. This Word document has helped get the conversation started on the right step.
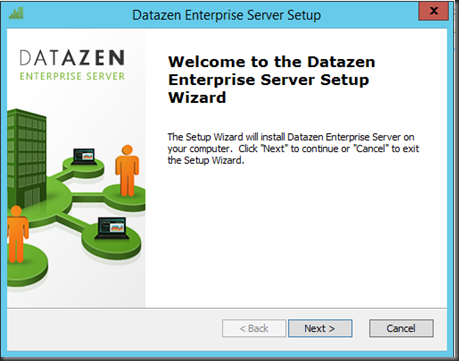
5. First we come to the standard welcome page. Click Next.
6. On the ‘End-User License Agreement’ click the accept radio button followed by Next.
7. On the Features page is where we choose the parts of Datazen Server we would like to install. For now leave the defaults, unless you want to change the install location, and click Next.
This is useful when scaling-out a production environment.
8. On the Core Service Credentials page we can choose the Run Core Service account. For the use of this Sandbox I would leave the defaults and click Next.
If you are building this on a domain network follow the best practices and change the account to a domain service account.
Now we are getting to the heart of the install. Pay close attention to the next few steps. They are very important to the setup and your data.
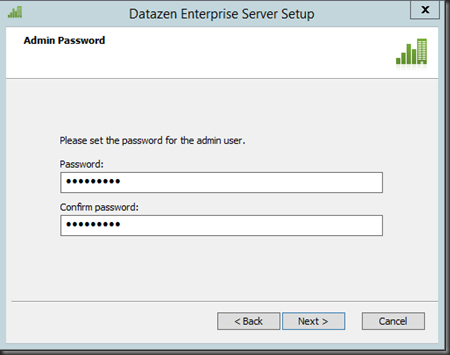
9. Create and Enter an Admin password for DataZen. This will be the only Admin password for DataZen. Other Admin accounts cannot be setup later, so guard this password.
10. At this point, I recommend opening a notepad file for items that you will need to copy & paste over the next few screens.
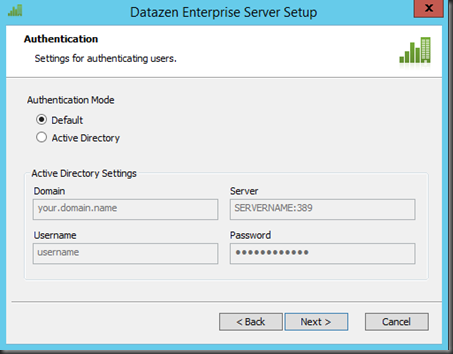
11. On the Authentication page we can leave the Authentication Mode as ‘Default’ and click Next.
The Authentication method can be changed later in the server setting if needed.
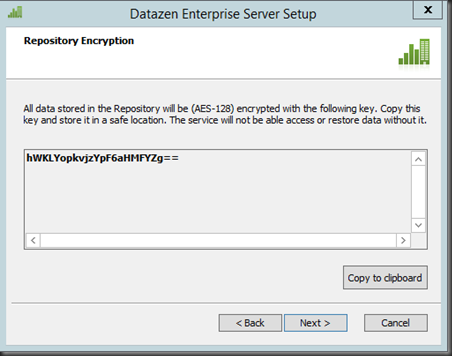
12. DataZen by default encrypts the Repository with AES-128 encryption. Click the “Copy to clipboard” button and paste in the open text file. After pasting the key in your notepad doc, click Next.
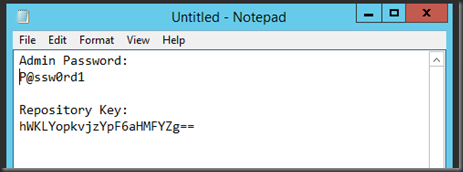
13. Label the key in the text file ‘Repository Key’ like the screen shot. This is not the only unique ID we will get from the installer and we need to keep them labeled.
14. Now we are given the Instance ID. Once again click the “Copy to clipboard” and paste in the text file with the label ‘Instance Id.’ As stated in the description this Id is used when scaling-out DataZen. It is good practice to save the Instance Id incase you want to scale-out your test environment. Click Next.
15. Next, we come to the credentials for the Data Acquisition Service. Since this is a sandbox either leave as is. If you changed the Core Server credentials in Step 8, click the ‘Use Core Service credentials’ button. Click Next.
16. Almost there, on the Web Applications IIS Setting page I would recommend leaving the defaults if you are not familiar with IIS.
I have tested installing DataZen along side another web app. I had to spend a fair amount of time reconfiguring IIS, Datazen, and the other web app. Once I got everything reconfigured the apps worked correctly. The difficult part was getting IIS reconfigured correctly .
Also, don’t be tempted to change the port to 443 for SSL. DataZen handles the security for you later.
17. This is the last configuration page before Datazen installs. If your organization uses an SMTP server that does not require a login, then feel free to fill out this page; otherwise, leave the default because you will have to make some changes to a config file after install in order for email to work. The email server is important with default authentication because DataZen lets the Admin set the username, but only the User can set the password. Click Next.
Once finish a blog post on how to manually setup the configuration for servers that require authentication, I’ll post the link here.
18. Ready for Install? Yes. Click Install
The install will take a while so go refill the coffee.
19. In the meantime, save and store that text file.
20. After the install is complete, close the installer, Open IE, and type ‘http://localhost/cp’ in the address bar.
You will be taken to the DataZen Server Control Panel login page. If you leave off the ‘cp’ and type ‘localhost’ you are taken to the viewer page, which is for viewing dashboards via a web browser.
The username is ‘admin’, password is the one you set during setup.
Enjoy!!




Hi Cory,
Thanks for the great article!
I was tempted to put 443 as the datazen server port but you say no. How do I handle security later?
I am on azure vm and would like to use azure so provided certificate.
Thanks,
Ric
LikeLike